How many emails to you get each day? Too many we hear you shout! And we would wager then several of them are merely updates, information emails about “company performance yesterday” and so on. The sort of email you don’t necessarily need to read immediately but would like to have on file just in case. You try to file them every day but eventually they just clutter up your already bulging inbox.
Well, did you know you can automatically file these emails without them even going into your inbox? Here’s how.
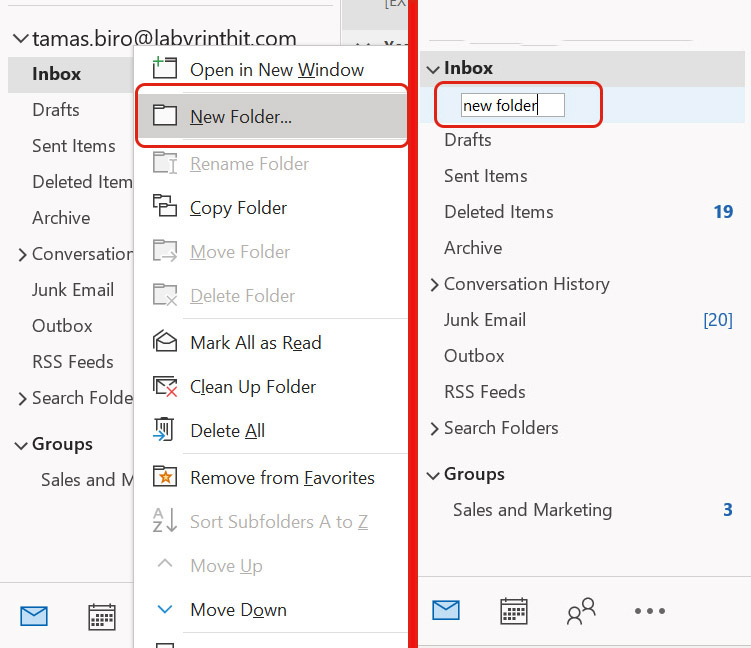
Within Outlook, on the left-hand panel right click your Inbox and select New Folder. Type the name of the folder you want the emails to be moved into, then press the Enter key. If you already have a file ready to receive these emails, ignore this step.

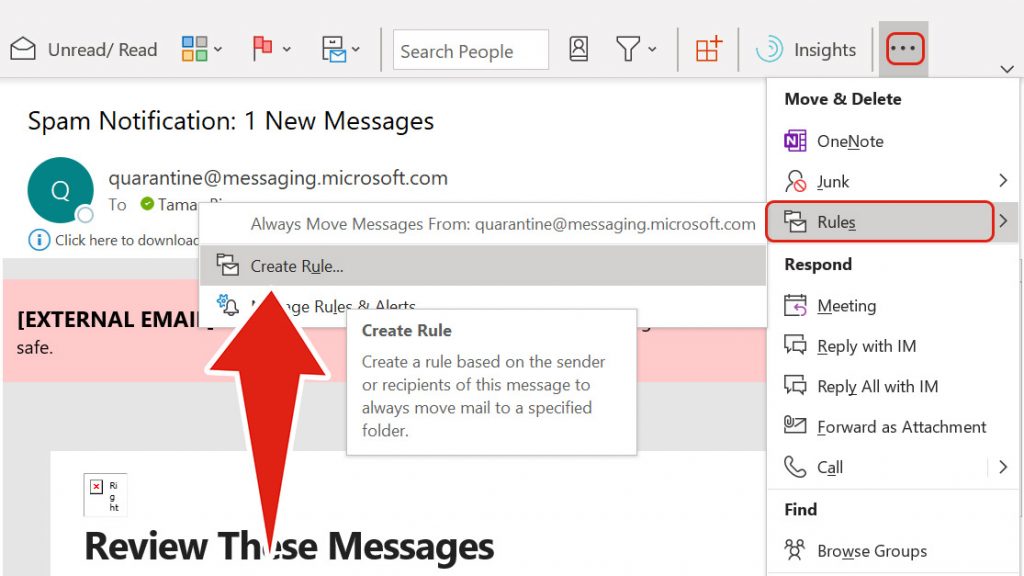
There is a SIMPLE way and an ADVANCED way to do this, and today we are dealing with the EASY way only. So, from wherever it is in Outlook find the latest email in the series you want to file automatically (like the daily update email mentioned above) and click on it. No need to open it though. Now make sure the Home tab is selected and locate the 3 dots at right end of the menu bar. Click this and then click or hover on Rules. A pop-up window will appear, and from this box select Create Rule.

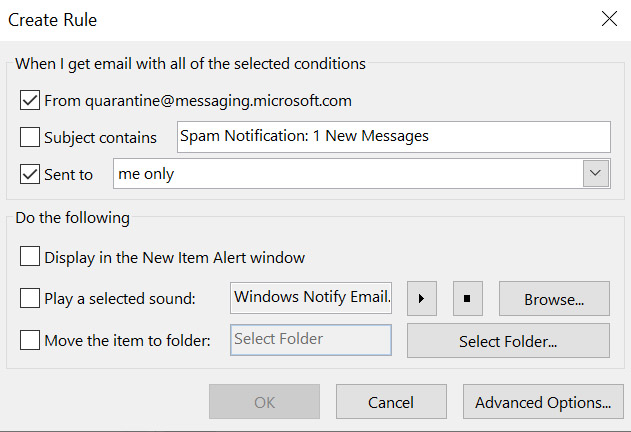
You will now see a pop-up box with options for you to select regarding which emails you want to file automatically:
You will also see in this box options regarding what you want to happen to these emails:

Remembering that we are following the EASY method for the purposes of moving a regular email, so you should find that the From and Subject fields will be pre-completed, so all you need to do is check these. However, be careful, because if the subject changes because it contains a date for instance, you would need to remove the date part from the Subject contains box (Daily Digest 17/02/21 becomes merely Daily Digest).
Clicking the arrow in the Sent to box allows you to stipulate whether the emails to be automatically filed are those sent to you only, one of the other recipients, or (assuming we are doing this for regular company emails) the distribution list itself (“Management Team, All Staff and so on).

Once you are happy with the “When I get email with all of the selected conditions” boxes, it is time to look at the last 3 boxes in the “Do the following” section.
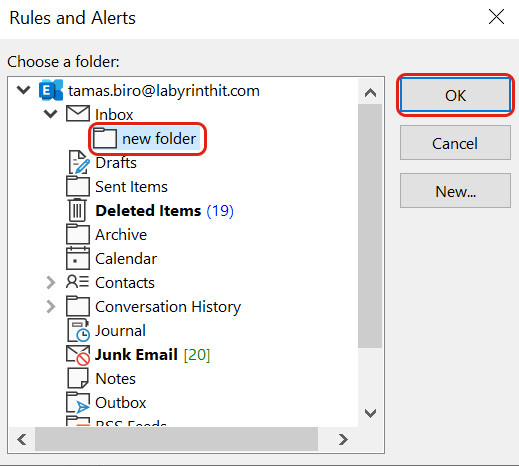
Because we are only concerned today with moving emails automatically, ignore the first 2 boxes. Go to, and check the box called Move the item to folder, and then select the destination folder from the list presented to you in the pop-up box.

And that’s it. Click OK and you are done.
Just remember the following:
Also remember that this is the EASY and SIMPLE version, and that there is also a DIFFICULT and COMPLICATED version, where you have a lot more options and can do more complicated things. Our advice is not to worry about that. Do not click on Advanced Options, you will just get confused. Keep it simple and make your inbox a little bit tidier.
Empowering London Businesses with Efficient IT Solutions to Save Time and Stay Ahead of the Competition.