
In today’s digital era, effective email management is essential for maintaining productivity and staying focused. Unwanted emails, such as spam or promotional messages, can inundate your Outlook inbox, leading to information overload and reduced efficiency. Fortunately, Microsoft Outlook provides powerful tools and features to help you block and filter unwanted emails. In this article, we will provide a step-by-step guide on how to block emails in Outlook, enabling you to take back control of your email communication.
Before we delve into the blocking process, it’s crucial to identify the emails you wish to block. These can include spam emails, promotional messages, newsletters, or specific emails from particular senders. Take a moment to go through your inbox and identify the people or senders who frequently send you unwanted emails that you’d like to remove.
If you are using the older version of Outlook on Windows, you can block emails by following the steps below:
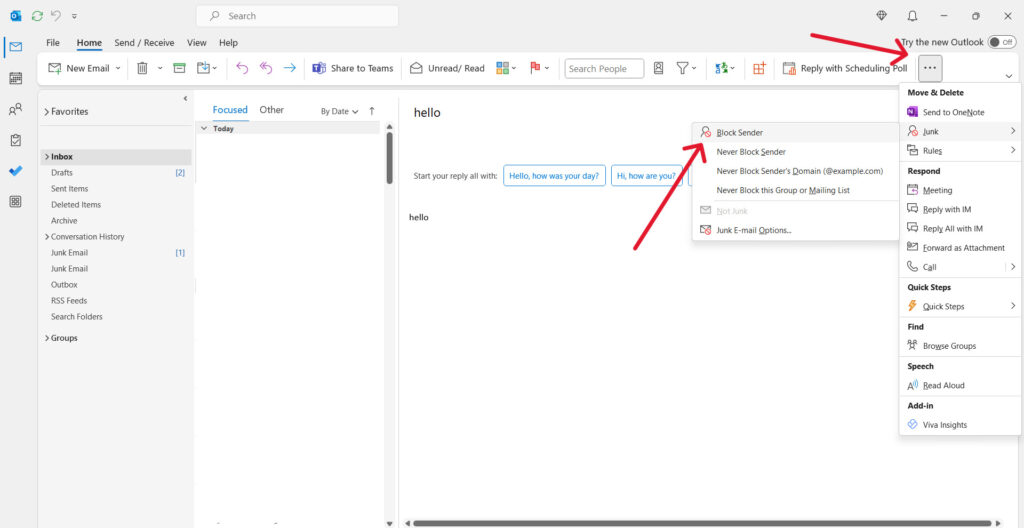
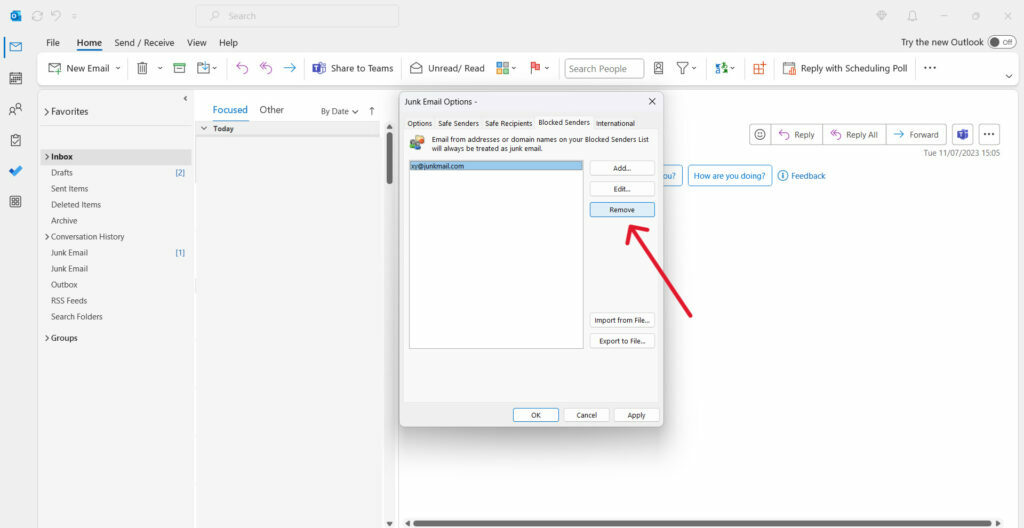
Note: If you wish to remove a blocked sender, go to Junk -> Junk Email Options. Select the email address or domain name you wish to unblock. Click on Remove, then OK.
There are two options to choose from:
First option:
You can block sender the same way as in the older version of Outlook: Select an email from the email address you wish to block emails from. -> In the top toolbar, on the right, click on the three dots “More options” -> Block, then click on “Block sender“.

Second option:
To block emails from specific senders, go to View -> View Settings -> Click on “Mail“. In “Mail”, go to “Junk email“. Clicking on “Add“, and type in the email addresses of the senders you wish to block, then press Enter. Finally, click on “Save”. 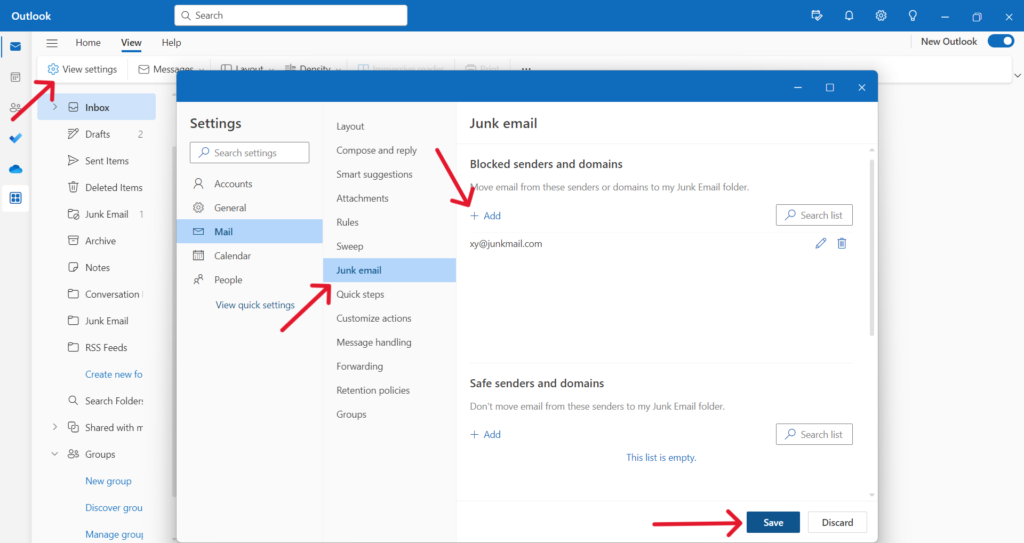
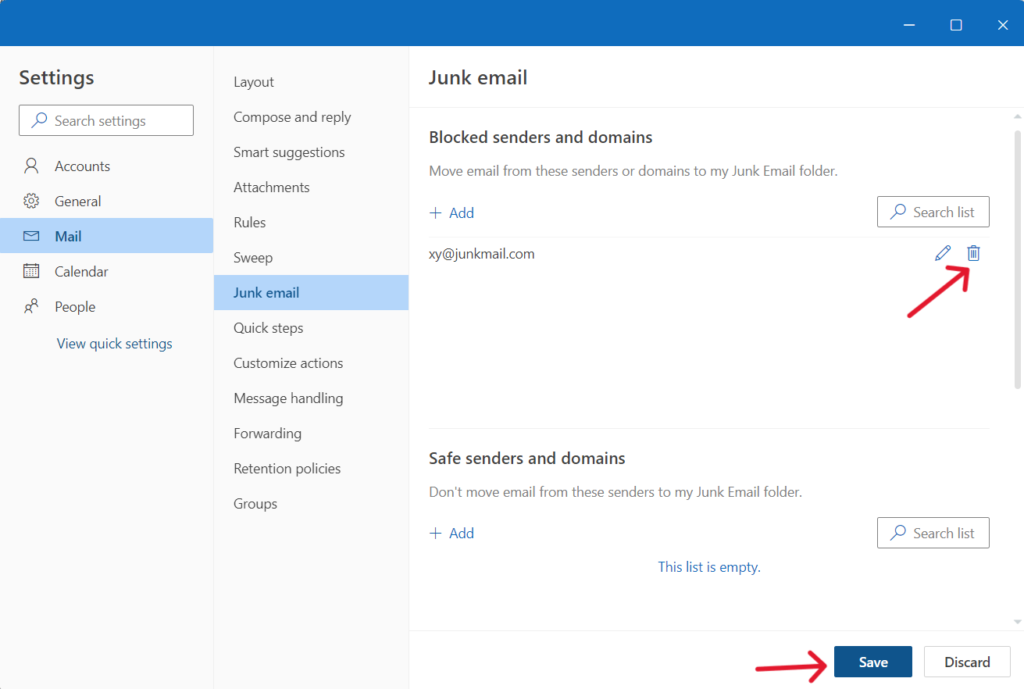
Note: If you want to unblock an email address that you previously blocked, go to the Settings section in Outlook, select “Mail,” then “Junk Email”. Finally, click on the Trash Can icon next to the specific address you no longer wish to block emails from.
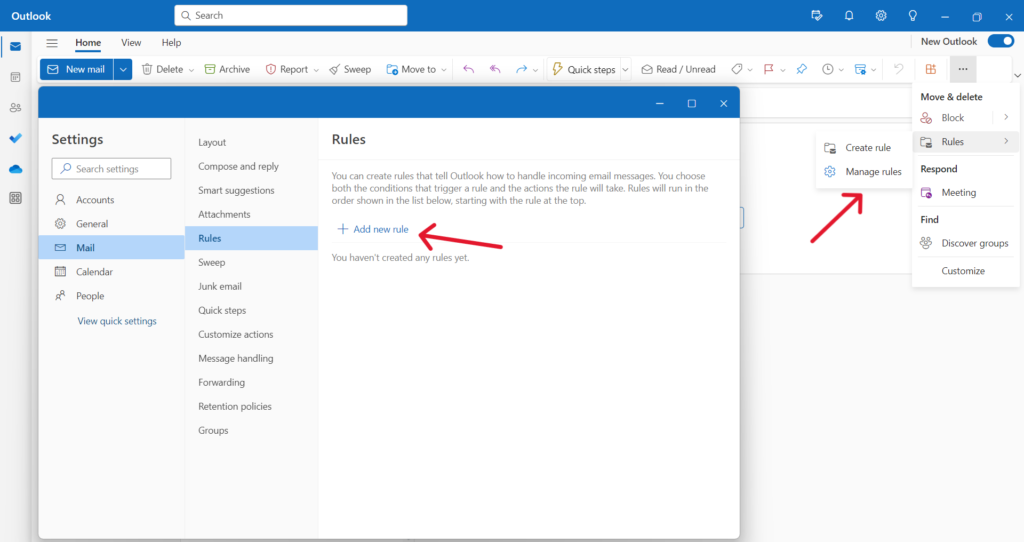
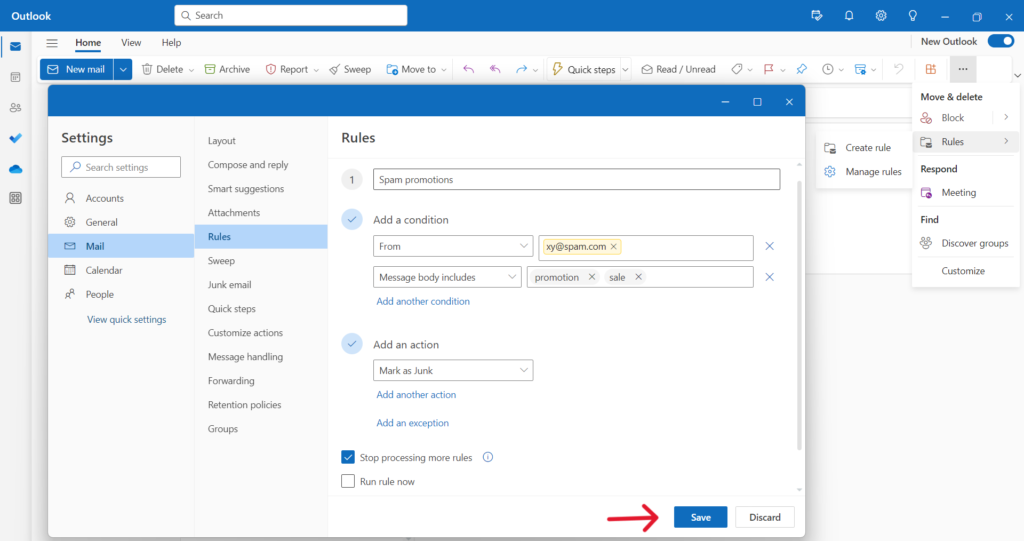
Outlook’s email rules feature allows you to automatically process incoming emails based on specific criteria. By creating rules, you can efficiently categorize, move, delete, or forward emails that meet certain conditions. Follow these steps to create a rule for blocking emails:
By following the step-by-step instructions outlined in this guide, you can gain control over your email communication and create a more efficient and streamlined workflow. Embrace the power of Outlook’s blocking capabilities, leverage email rules to automate processes, and take charge of your digital productivity.
Empowering London Businesses with Efficient IT Solutions to Save Time and Stay Ahead of the Competition.